When I first began working with Omeka, I was pleased to find so many resources for getting started. However, it became apparent that many of these guides were written for people with a tenuous understanding of the Internet, which is great for bringing the technology to a maximum number of people, but terrible for us impatient Millennials who don’t need basics like “how to create a login” explained to us. And so, I present to you this guide to getting started with Omeka for people with a basic grasp of the Internet. The caveat being that I am extremely far from expert, and so even this masterful guide will remain on a very superficial plane.

“Kitten’s Game” by Dutch painter Henriette Ronner-Knip. Victorian Cats will return again soon. Prepare yourself.
Omeka.net vs. Omeka.org
Your first decision will be whether to use omeka.net or omeka.org. The basic difference is that omeka.net provides hosting, on a sliding price scale from free for 500 MB of data to really expensive for 25 GB of data, while omeka.org is totally free, but you have to figure out that whole hosting bit yourself. I assume that if you are reading this blog post, you are not the web developer for a professional organization, so I would advise you to stick with omeka.net. The maximum file size on a paid Omeka account is 2 MB, so 500 MB equals 250 maximally-sized items, plenty for your Victorian Cats Online project. [1]

They kind of hide the free account on you, but it exists. Gotta love the tricksy “99” pricing, too.
Go ahead and make an account, you delightfully computer-literate human being, you. (Pro Tip: all e-mails from Omeka get redirected to my Gmail spam folder. But you probably knew to look there.)
Building your site
As soon as you log into your fancy new account, Omeka will helpfully declare: “Your online exhibit is one click away,” without equally prominently providing said link. Keep it classy, Omeka. In actual point of fact, your exhibit is at least two clicks away: My Dashboard, and then Add Site. Fill out a form, and by click three, you are in business.

Pretty simple, but you do need to make some decisions before you get started. PS: I know I misspelled “Gollum.” Don’t worry; I fixed it later.
You now have an empty, boring website, just waiting for a few items to spice things up, which you will add from within Manage Site. But first, let’s take care of the most important business–making everything pretty.
As a free user, you have access to a limited number of plugins, but to get the full Omeka experience, you only need to install two of them: Exhibit Builder and Simple Pages. Click on Plugins at the top of the page, and add these two, and any others that suit your fancy. (Google Analytics is a great one for us vain Millenials who need pageview statistics to validate our existences, but does require you sign up for an account with our technological overlords.)
Before we begin building the site in earnest, click on Appearance next to Plugins. This area lets you choose and customize a theme. If you are using omeka.org, you actually have access to the back-end “guts” of your theme for more complex design work. I do not have the coding skills to explain how to do this, so instead we are sticking with the easy, pre-made stuff. Still, you have some neat choices within the themes if you click on Configure Theme (the blue bar under the theme preview). The options differ based on your theme choice, so play around a bit and decide which options sound good to you. Your website is already published, so you can immediately see what different options look like by saving changes and opening your webpage.

This is an Omeka homepage with all the “Configure Theme” bits filled in for the Berlin theme, so you can get an idea of where stuff goes and make your site dramatically more attractive than this one.
You can also mess around with your site’s Navigation and Settings (in the tool bar next to Themes). Navigation will let you add links to the tabs at the top of your website (for example, you can link to pages built in Omeka’s Simple Pages tool) [2] and choose a specific link as a homepage so that it doesn’t look like the crazy mess in my image above. Settings lets you change number-y file details, for those extreme control freaks amongst us. (Even for regular folks, it is a good idea to uncheck Show Empty Elements here, so that your item pages aren’t junked up with metadata fields you didn’t bother to fill in.)

Yes, although both of these menu options are called “Settings,” they do completely different things. So if you are skimming this tutorial, lazy Millenial, pay attention here!
One last administrative note: the Settings tab at the top of the page (next to Plugins, Appearance, and Users) lets you change your site’s basic information (title, etc.) but also customize some of the content-management aspects of Omeka (searching, Dublin Core metadata, etc.). If you are building a large, intensively academic Victorian Cat repository, you should spend some time reading these pages and considering which metadata options make the most sense for your items.
Adding Items
Now, it is time to get to the meat of an Omeka site—uploading items. Before you begin, you should have an idea of how you plan to organize your collection. Omeka gives you lots of options, easily accessible from the grey toolbar on the left. These include Items (uploading individual items and managing metadata); Collections (groups of related items displayed on one page); Exhibits (most akin to a museum collection; allows you to relate the items to each other with text, crafting a specific story); and Simple Pages (one-off pages, good for designing extra bits like “Resources” or “About” pages, or including HTML content from other websites). There is no rule regarding how you use these options, except that an item must be uploaded in Items in order to exist for use elsewhere. I like to organize every single one of my Items into Collections so that they are easily searchable, and then build the Exhibit pages based on the collections. But I’m an organizational freak. You do you.
From this point forward, Omeka is delightfully self-explanatory. First, you need to upload your items. You can upload photographs, sound files, video, etc., and you can combine multiple files as one item (so, for example, a book could be one item, with files for every scanned page). Don’t forget to check the file size: 128 MB or less for the free account. (Pro Tip: the GIMP is a free, open-source photo editing program that lets you compress files to exactly the correct size. From within the GIMP’s “Save” dialogue, tick “Show preview image in window,” and you will see what size the file is, depending on the position of the “Quality” slider.)

All the files I pulled from Wikimedia Commons are crazy small, actually; this was more important for the huge photographs I took myself.
When adding items, you should include the Dublin Core Metadata appropriate to your project, and any Item Type Metadata appropriate to the kind of resource you are cataloging, keeping in mind that users can search for items based on the metadata you supply. You will need to decide what kind of item you are recording—if it is a photograph of a statue, for instance, is the statue the “item” and the photograph a “file” connected to that item, or is the photograph itself the “item” you are storing? I also love tags, so my tendency is to go bananas with them. You can easily add/subtract information later, which is great for correcting mistakes … but don’t rely on yourself to go back and add metadata to an otherwise finished project.
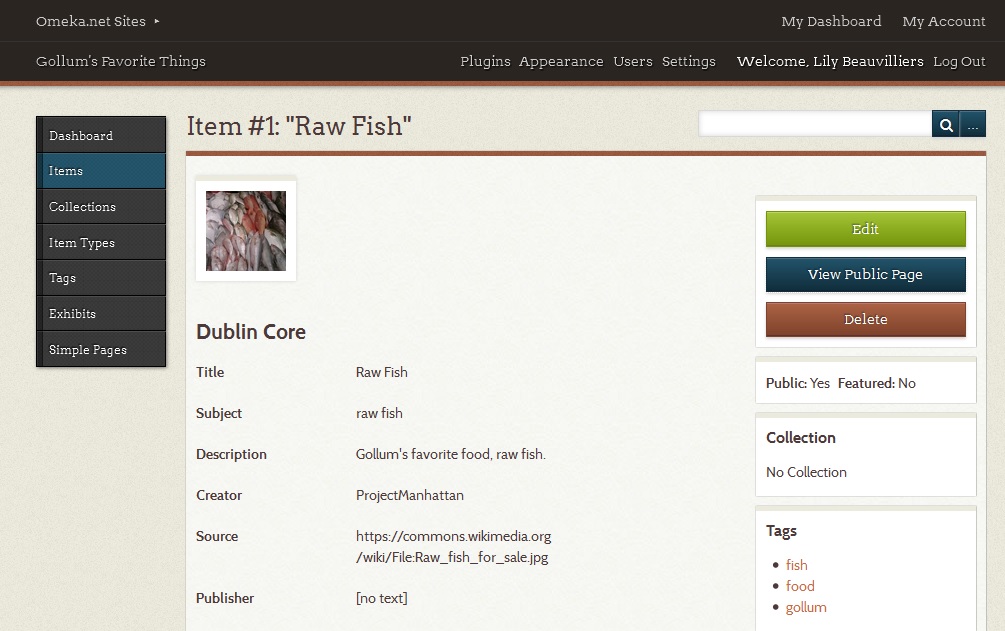
A completed item page. Notice the “[no text]” next to “Publisher”? I screen-grabbed this before unticking “Show Empty Elements.” Do as I say, not as I do. (To see the public page, click here.)

This is what the public sees when it navigates to a collection page. Check it out live here.
Once you have your Items and your Collections set up, you’re ready for the exciting bit—an Exhibit. Exhibits begin with a launch page, and then consist of sub-pages, which you can think of as individual “cases” within your museum. Give your Exhibit a title, a “slug” (URL extension, i.e. myprecious.omeka.net/slug), and a description. Unless you specify a different launch page, this information will be the first thing users see. Then, you can easily add Pages (cases) to your exhibit. You have a pretty limited number of design options, but you can stack different kinds of Blocks (a file and text, a gallery of files, just text) to get some interesting designs.

My exhibit is ugly as sin, but demonstrates what some of the design features actually look like in real life. Check it out live here.
Simple Pages provide a space in which you can paste text, HTML, and “shortcodes,” or Omeka shortcuts for web design. It is harder to include items in Simple Pages than in Exhibits, so reserve Simple Pages for extra material, not your “case” items.
And that, my youthful friends, is your introduction to Omeka. Obviously, the exhibit created in this tutorial is heinous. You’ll want to play around to make something less repulsive. More warm. More cuddly. More Victorian. You can get a sense of how all the pieces go together at my delightfully half-baked site, myprecious.omeka.net.
Endnotes
[1] Told you. By the by, if you are actually working on this project, please let me know. It is very relevant to my interests.
[2] The “About” page I defaulted to is, in fact, a Simple Page automatically generated by Omeka. Check out the simplified launch page here.
